Vagrant is a great tool to provision virtual machines! As I’m a passionated Windows user, Vagrant is the weapon of my choice whenever I need to use some Linux-only tools such as Docker. I spinn up a new Linux VM, already configured with the things I need and start working. However, when it comes to resizing a disk, Vagrant is not nice to you…
The problem
Vagrant doesn’t provide any out-of-the-box option to configure or to change the disk size. The disk size of a VM totally depends on the base image used for the VM. There are base images with a 10 GB disk, some with a 20 GB disk and some other with a 40 GB disk. There is no Vagrant option to change this - and even worse: most Vagrant boxes use VMDK disks which cannot be resized!
Resizing (manually) with VirtualBox
As Vagrant doesn’t provide any out-of-the-box functionality, we need to do the resizing “manually”. Of course, we can write a script for this, too, but for now we keep it simple and do it by hand.
- First we need to convert the VMDK disk to a VDI disk which can be resized.
We do this with the
VBoxManagetool which comes with the VirtualBox installation:
VBoxManage clonehd "box-disk1.vmdk" "cloned.vdi" --format vdi
- Now we can easily resize this VDI disk, e.g. to 50 GB:
VBoxManage modifyhd "cloned.vdi" --resize 51200
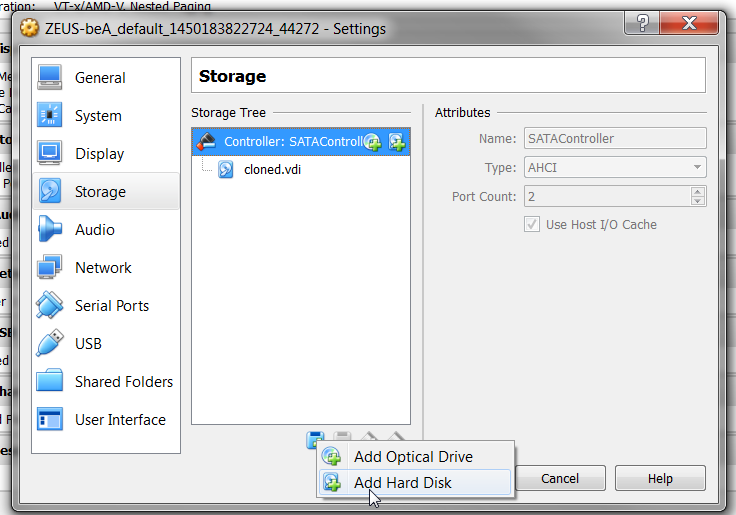
- The last step we need to do is just to use the new disk instead of the old one. We can do this by cloning the VDI disk back to the original VMDK disk or within a view clicks in VirtualBox:
That’s it! Now start your VM with vagrant up and check the disk space.
It’s at 50 GB and we have new free space again!
   vagrant@vagrant-ubuntu-trusty-64:~$ df
   Filesystem     1K-blocks      Used Available Use% Mounted on
   /dev/sda1       51572348  39944676   9472380  81% /
   none                   4         0         4   0% /sys/fs/cgroup
   udev             2010488        12   2010476   1% /dev
   tmpfs             404804       356    404448   1% /run
   none                5120         0      5120   0% /run/lock
   none             2024000         0   2024000   0% /run/shm
   none              102400         0    102400   0% /run/user
   overflow            1024         0      1024   0% /tmp
   var_vagrant    487250940 373334608 113916332  77% /var/vagrant
   vagrant@vagrant-ubuntu-trusty-64:~$
More
- http://stackoverflow.com/questions/11659005/how-to-resize-a-virtualbox-vmdk-file
- https://www.virtualbox.org/manual/ch08.html#vboxmanage-modifyvdi
Best regards, Thomas.